Starter guide: Difference between revisions
m (→Setting Up) |
m (→Finding Your Way Around: typo) |
||
| (94 intermediate revisions by 9 users not shown) | |||
| Line 1: | Line 1: | ||
= [[What is SS13|What is SS13?]] = | = [[What is SS13|What is SS13?]] = | ||
'''Space Station 13''' is a multiplayer <u>sandbox</u> that has a heavy focus on player interaction. In the year 2557, the megacorporation [[Nanotrasen]] employed you as a staff [[Jobs|member]] onboard their latest state of the art [[Guide to Research and Development|research]] station. Nanotrasen claims to be researching [[plasma]], a mysterious new substance, but rumors abound that the station is little more than a [[Clown|twisted]] [[Traitor|social]] [[Assistant|experiment]]...{{Speech | |||
{{Speech | |||
|name=Tuterr, the Private Eye | |name=Tuterr, the Private Eye | ||
|text=Hmph. Fresh off the boat from Nanotrasen's recruitment office, huh? Let me tell you something, kid. You won't last five minutes on this floating deathtrap without help. You're as likely to be left for dead in a dark maintenance tunnel riddled with bullet holes as you are to get out of here alive. Lucky for you, I'm in a helpful mood today. | |text=Hmph. Fresh off the boat from Nanotrasen's recruitment office, huh? Let me tell you something, kid. You won't last five minutes on this floating deathtrap without help. You're as likely to be left for dead in a dark maintenance tunnel riddled with bullet holes as you are to get out of here alive. Lucky for you, I'm in a helpful mood today. | ||
|image=[[File:Generic detective.png|64px|right]] | |image=[[File:Generic detective.png|64px|right]] | ||
}} | }} | ||
At the start of each round, each player is assigned a role onboard the station. There are many jobs, such as the [[Scientist|scientist performing research and development of new technologies]], the [[Medical Doctor|medical doctor]] trying to keep people alive, or the simple [[janitor]]. There are many ways to play. The game also randomly chooses a [[Game Mode|round type]], ranging from an all-out assault on the station by [[Nuclear Operative|nuclear operatives]], a sinister [[Blood Cult|cult sacrificing crewmembers]] to summon their [[Nar-Sie|god]], or more commonly, good ol' fashioned [[Traitor|traitors]]. It is player driven and not some procedurally generated indie game. Every round on '''Space Station 13''' is different and a completely unique experience. | |||
== Before Playing == | |||
Your choices matter in SS13. They have [[Ghost|consequences]]. The [[rules]] are here to ensure that when [[How to Roleplay|drama]] and [[Guide to Combat|conflict]] happen, they happen in a way that is [[Byond the impossible|beneficial to all parties involved]]. <u>You should read the [[rules]] before playing</u>. If you don’t understand them all don’t worry. You can engage in the server more and more as you understand. | |||
At a base level, don’t attack players without any reason. Role playing as an “insane person” is '''not valid'''. If you want to be extra safe (there is no reason to be this afraid though) you can avoid any kind of fight. Most rules define who, what, where and how is allowed to fight, main or kill someone else. If you don’t fight you automatically comply with these rules. One last point: Please, remember the human. SS13 can be highly frustrating. You will be unceremoniously killed, griefed, or die to some galactic space-bug shortly before executing your master plan. Everyone is here to play a game they enjoy, so keep that in mind before you bash someone's brain in with a [[toolbox]] because they took your [[multitool]]. | |||
== Getting Help == | |||
If you happen to get confused about something there are several ways to resolve this. The easiest is to contact a [[mentor]]. There is almost always at least one online. Don’t be shy! They love helping new players! In the top right there is a mentor tab. You can use “mentorwho” to check if any are online. Then you can use “mentorhelp” to send your question. | |||
In the case there are none, you can ask the players around you. It might be difficult to communicate your problem in an [[IC]] (in character) way. It might also be difficult to answer in an [[IC]] way. That is why we have the LOOC or “local out of character” button which defaults to the '''U''' key. LOOC is a special yellow text visible only in the chat window. Meaning it has no rune text (text over the head). LOOC is used to discuss [[OOC]] things. For advanced users it’s used to [[Byond the impossible|set up more complex RP scenarios]]. For beginners, like yourself, it’s used to explain controls in a literal “click this press that” way that [[IC]] does not allow. | |||
''' | |||
== Setting Up == | == Setting Up == | ||
Download the [https://www.byond.com/download/ BYOND client]. If you are in the Discord server (you should be; it's where all the drama happens!), you can use the ?byond command in the bot-spam channel. BeeStation has one server: | |||
*'''The Main BeeStation Sage:''' byond://sage.beestation13.com:7878 | |||
To join the game, you can use the links on the website. If you are in the Discord server there is a dedicated bot-spam channel. Use the “?cs” command to ask the bot about the current round information on the main BeeStation server Sage. The bot output will include a link that you can just click. These two methods are preferred by most veteran players (mostly the latter) since you avoid interacting with the icky Byond client. You can also use just "?c". | |||
Once you are in you will see a small window with some buttons. This is either “Ready” and “Not Ready” buttons or the “Join Game!” button depending on if the round is about to start or on-going. There is also a “Create Character” button we will be using shortly. | |||
BeeStation operates on a round based system. Every round is a new “shift” not related in any way to the past ones. The typical round length is around 1 hour and 30 minutes. This is because at that time there is a “crew transfer vote” which is basically a “are we done with this round?” vote. This is also plenty of time for things to go horribly wrong in the case of any of the [[Game Mode|major game modes]]. | |||
If you jump onto the server, you are very likely to have joined during an active round. Using the “Status” tab, you can see the current round information. Speaking of which... | |||
=== Client Interface === | |||
Look at the top right of the game window. You'll see some tabs. The most important tabs are the Status and Admin tabs. The admin tab contains the “'''adminhelp”''' button, used to contact admins directly if you have a <u>'''rules question'''</u> or believe someone is breaking the rules. For gameplay use the mentor tab. Here is a quick break down of the tabs: | |||
* Status: Displays important info such as your ping, the current map, pressure remaining in airtanks, etc. | |||
* [[Admin]]: Contains buttons that allow you if any admins are online, and most importantly, to send a message directly to the admins (the '''adminhelp''' button). If no admins are online, the message will be forwarded to the admin IRC channel. | |||
* [[Mentor]]: Explained in the “getting help” section. Contains buttons that allow you to see if any mentors are online, and allow you to ask a question directly to the mentors (the "mentorhelp" button). Mentorhelps are not forwarded like adminhelps. | |||
* [[IC]]: Usually, won't use this. The '''Pray''' button allows you to send a message to any admins online in character meaning it's used for "communicating with the gods". Or the Notes button which has your bank ID or shows any antag objectives if you have them. | |||
* OOC: Stands for "Out of Character". Various functions that are related to the game, but not something your character does. View Webmap, View tracked playtime, and View Admin Remarks are the most used verbs here. | |||
* Preferences: Self-explanatory. Contains various options you can toggle on and off. You can also open Character and Game Preferences at any time with the corresponding buttons. | |||
[[File:Status_tab_top.png]] | |||
On the right side will be the chat window. And above the chat window there are some tabs like “Admin” or “Preferences”. Feel free to immediately click the blue gear in the chat window and turn on night mode. Anyway, before you can join we need to create your character. | |||
===Character Creation=== | |||
{{Speech | {{Speech | ||
|name=Tuterr, the Private Eye | |name=Tuterr, the Private Eye | ||
|text=You're brand new here, so make sure you sign up as an Assistant. Nanotrasen usually has checks to make sure fresh meat doesn't get to be the Captain, but if you manage to end up in that position, you'll probably be just another case for me to solve.|image=[[File:Generic detective.png|64px|right]] | |text=You're brand new here, so make sure you sign up as an Assistant. Nanotrasen usually has checks to make sure fresh meat doesn't get to be the Captain, but if you manage to end up in that position, you'll probably be just another case for me to solve.|image=[[File:Generic detective.png|64px|right]] | ||
}} | }} | ||
Recommended species for new players is [[Humans|human]]. Humans don’t have any major ups or downs. Later you can play as one of the [[Races|more exotic species]]. Other than that, it’s all mostly cosmetic. Once you've finished editing your appearance, the box in the title bar should hopefully say "Saved!", verifying that your choices saved properly. | |||
'''Job Preferences''' | |||
The Occupations tab lets you select your job preferences when a new round is starting. You, as a new player, want to set assistant to ON. For more information about job distribution on round start [[Job selection and assignment|see here]]. Again, this only applies to round start. In the case of on-going rounds, the “Join Game!” button will just let you pick what job you want assuming there are open slots. In the case of assistants that is always. | |||
Some jobs have different character names when you play them, such as AI, Cyborg, Clown, and Mime. You can access these name options by pressing the hamburger button (three lines) next to your character's name in the Character tab. Please keep in mind that some of these roles are affected by [[Naming Guidelines]]. | |||
'''Game Preferences''' | |||
You can also access your Game Preferences by pressing the gear at the top of the character setup. In this menu, you can customize various sound, UI, HUD, and other preferences. | |||
Some of the most commonly modified preferences are: | |||
* Sound toggles, typically ambience or lobby music. | |||
* Pixel Scaling / Scaling Method, which determines how the game scales icons. Using a pixel perfect preset that fits your screen can increase the clarity of icons. | |||
* FPS (frames per second). | |||
* HUD Style, which adjusts the look of your ingame HUD. | |||
* Ghost Chat toggles, these can reduce the clutter in chat while you are dead. | |||
'''Antagonist Preferences''' | |||
Once you are more familiar with the game, you can also customize your antagonist preferences in the Antagonists tab. By default, they start enabled, but are locked behind playtime, so don't worry, you won't be thrust into one of these roles before you know how to play. If you're worried about this, you can also go ahead and press the Global Disable Everything button at the top for now.<gallery> | |||
File:Character settings.PNG|Character Creation Screen | |||
File:Occupation Screen.png|Job Preferences Screen | |||
File:Antagonist Preferences.png|Antagonist Preferences Screen | |||
File:Game prefences Screen.PNG|Game Preferences Window | |||
</gallery> | |||
== HUD & Controls == | |||
The biggest barrier to entry in Space Station 13 is the controls. Despite the reputation once it clicks, you'll never have an issue with it again. '''Don't let it overwhelm you!''' After a round or two of practice, you should be fine. | |||
===HUD=== | |||
{{Speech | {{Speech | ||
|name=Tuterr, the Private Eye | |name=Tuterr, the Private Eye | ||
|text="Interface"? What the hell are you talking about, kid? "Blue buttons?" Geez, you've been here for five minutes and you're already cracking. Hmmm... *recorder crackles* Note to self - check atmospherics. Gas might be poisoned.|image=[[File:Generic detective.png|64px|right]] | |text="Interface"? What the hell are you talking about, kid? "Blue buttons?" Geez, you've been here for five minutes and you're already cracking. Hmmm... *recorder crackles* Note to self - check atmospherics. Gas might be poisoned.|image=[[File:Generic detective.png|64px|right]] | ||
}} | }} | ||
The top right of the screen contains the action tabs and the bottom right is the text log or chat window. This is where you can see what people are saying, what's happening around you, and chat such as OOC or adminhelps. The bar along the bottom of the screen is the input bar, but since we're on [[Keyboard_Shortcuts|Hotkey]] mode we won't need to use it. There are a few HUD elements on the main screen, so let's break them down into sections. Don't worry if you can't memorize what everything does at once. You can always come back to this guide. | |||
The top right of the screen contains the action tabs | |||
<tabs> | <tabs> | ||
<tab name="Hands">[[File:Hud-hands.gif]] One of the most important elements of the HUD. You have the ability to hold an item in each hand (unless an item takes up both hands, obviously). The square around one of the hands is the '''selected hand'''. If you have an '''empty''' selected hand, and click on an object, you'll pick it up/open it/use it. If '''an object is in your selected hand''' and you click on something, you'll use it on the item you're holding. (The way this works means that if you'd like to unequip your backpack, you need to click and drag the bag into your hand - if it was removed by clicking on it, you'd never be able to open the bag.) | <tab name="Hands">[[File:Hud-hands.gif]] One of the most important elements of the HUD. You have the ability to hold an item in each hand (unless an item takes up both hands, obviously). The square around one of the hands is the '''selected hand'''. If you have an '''empty''' selected hand, and click on an object, you'll pick it up/open it/use it. If '''an object is in your selected hand''' and you click on something, you'll use it on the item you're holding. (The way this works means that if you'd like to unequip your backpack, you need to click and drag the bag into your hand - if it was removed by clicking on it, you'd never be able to open the bag.) | ||
| Line 163: | Line 93: | ||
The drop [[File:Hud-drop.png]] and throw [[File:Hud-throw.png]] icons do what the name implies. Dropping is self explanatory, but the throw button is a toggle - if it's on and you click somewhere, you'll throw the item in your hand at where you clicked. (You can also press R to enable throwing and Q to drop your held item.) | The drop [[File:Hud-drop.png]] and throw [[File:Hud-throw.png]] icons do what the name implies. Dropping is self explanatory, but the throw button is a toggle - if it's on and you click somewhere, you'll throw the item in your hand at where you clicked. (You can also press R to enable throwing and Q to drop your held item.) | ||
The pull [[File:Hud-pull.png]] icon only appears when dragging something, and can be pressed to stop dragging an object. [[Keyboard_Shortcuts|Hotkey]]: " | The pull [[File:Hud-pull.png]] icon only appears when dragging something, and can be pressed to stop dragging an object. [[Keyboard_Shortcuts|Hotkey]]: "H". | ||
The internals [[File:Gmaskinternalsicon.gif]] icon can be clicked to enable/disable your internals (oxygen tank and breath mask). | The internals [[File:Gmaskinternalsicon.gif]] icon can be clicked to enable/disable your internals (oxygen tank and breath mask). | ||
| Line 197: | Line 127: | ||
[[File:Hud-hunger.gif]] '''Hunger warning''' - You're starting to get hungry. You cannot die from hunger, but the longer you go without food, the slower you will be able to run. You can also eat too much and become bloated.</tab> | [[File:Hud-hunger.gif]] '''Hunger warning''' - You're starting to get hungry. You cannot die from hunger, but the longer you go without food, the slower you will be able to run. You can also eat too much and become bloated.</tab> | ||
</tabs> | </tabs> | ||
===Controls=== | |||
[[File:Hotkeys.png|thumb|500px|[[Keyboard_Shortcuts|Keybindings]] for the hotkey mode.]] | |||
'''Don’t get scared by the hotkey image.''' It shows ''all'' the controls and their alternatives. This might seem like a lot, but don't worry, you'll only be using a few most of the time. The control are quite elegantly designed. There are exceptions, but for the most part you will be able to do anything from surgery to nuclear science with the exact same controls. You won't need to memorize 20 hotkeys. | |||
The default control scheme is “hotkeys” set in the game preferences menu. In case it’s not working you will see the bottom-right textbox in a red color. Click anywhere in the game window and press '''Tab'''. The textbox should go white showing that you are in “hotkey” mode. | |||
*Use the '''WASD''' keys to move around. | |||
* Press the '''X''' key to swap your active hand. The hand system is explained below. | |||
*Press the '''Q''' key to drop what you are currently holding in your hand on the ground. | |||
*Press the '''T''' key to talk. Prefix what you say with a semicolon (;) to say it in the global radio channel. Use the '''M''' key for non-verbal actions like “smile” or “wave”.Use the '''U''' key for LOOC (described in Getting Help). | |||
*Use '''left click''' on a thing to interact with it. Interact means different things based on the thing you are clicking. Use '''right click''' for a context menu (mostly used for stacks of items). | |||
*Press the '''Z''' key with an item in hand to “use” it. | |||
* Use '''WASD''' to move. | *Use '''SHIFT + click''' on anything to examine it. Your new favorite button combo. It will describe what you are looking at. As a new player you will be using this ''very often''. Use this on anything and everything. | ||
* Press ''' | If you just want to just jump into a round immediately the above controls should be enough for your first round. Doing a task, like, asking someone where the drink vending machine is, buying and then drinking something is a good way to start getting the hang of the controls. | ||
* | |||
* Press ''' | |||
* ''' | |||
* | |||
* | |||
It is '''necessary''' to read the '''[[FullControls|full controls page]]''' after your first (or such) round, however. You can also check out all the available [[Keyboard Shortcuts|hotkeys]]. | |||
== Gameplay Concepts == | == Gameplay Concepts == | ||
Before getting into anything else, it's important to note that since SS13 is such an open ended game that has other people in it, when you get in game and try to follow the guide, things may go wrong - the station might have been almost entirely consumed by a singularity, a traitor could attack you with a powerful weapon, or something no one could have predicted will kill you. '''It's important to not let death get to you!''' There are multiple ways you can be brought back into the game, so don't get frustrated if something happens. | |||
{{Speech | {{Speech | ||
|name=Tuterr, the Private Eye | |name=Tuterr, the Private Eye | ||
| Line 246: | Line 149: | ||
|image=[[File:Generic detective.png|64px|right]] | |image=[[File:Generic detective.png|64px|right]] | ||
}} | }} | ||
===The Hands System=== | |||
If an item requires two hands to use, then the other hand slot will instead be labeled as “off-hand”. Why do I start by telling you this? Because only one hand can be selected at a time. Imagine yourself as a creature with one hand. You only sprout a second hand when you need to use two handed items. | |||
Another time when you sprout an extra hand is to '''just''' hold an item. That is because your hands are also just a part of your inventory. However, think of them as an “active” part of your inventory. You place items in these “active” slots when you want to use them. | |||
The bright box around one of your hands is the selected hand. Swap your selected hand with the '''X''' key. This is the hand that's used whenever you click on something. If it’s empty. Otherwise, you will use what you are holding in your hand on what you clicked on. | |||
This can also cause problems with backpacks, boxes, and other containers. If you want to open a container, '''Alt + Click''' it. You can also pick it up, then switch hands and click on the container with an empty hand. Clicking on a container with an object will put it in the container. This also means that if you'd like to '''take your backpack off''', you need to click and drag the bag to an empty hand. Normal click just opens the equipped bag. | |||
' | |||
If you find this confusing, you should go check out the [[FullControls|full controls page]] already! It goes hand in hand (GET IT!?) with this explanation. If you still find it confusing, then maybe you should play your first round already because it really is not that complicated. | |||
===[[Intent|Intents]]=== | |||
The intent selector has four modes: '''help''' [[File:Intent_Help.png]], '''disarm [[File:Intent_Disarm.png]]''', '''grab''' [[File:Intent_Grab.png]], and '''harm [[File:Intent_Harm.png]]'''. This system mostly controls how you interact with things with your bare hands. You can learn more about these uses on [[Intent|the intents page]]. It's not, however, critical that you learn this right now. When it comes to using '''things''' this system is '''much simpler then it appears'''. Using a crowbar on someone will hit them '''regardless''' of intent. Most items work like that. Instead when it comes to '''things''' there are special use cases, for example: | |||
*While doing surgery, if you are '''not''' on help [[File:Intent_Help.png]] intent, you will intentionally botch it. | |||
*Clicking on something next to you with a gun will shot them point blank. If, however, you are on harm '''[[File:Intent_Harm.png]]''' intent you will hit them with the weapon instead. | |||
* Using harm '''[[File:Intent_Harm.png]]''' intent on an airlock with a welder will weld it shut instead of repair it. | |||
You don't need to know these things right now. It's just so you understand the types of specific thing you will use intents for. The only intent related thing I want you to know for now is that clicking on people with and empty hand with help [[File:Intent_Help.png]] intent will hug them. Very important. | |||
== Playing the Game == | |||
[[File:HUD_no_labels.png|thumb|489x489px|Arriving on the station.]] | |||
{{Speech | {{Speech | ||
|name=C-05-MO, the AI | |name=C-05-MO, the AI | ||
| Line 331: | Line 172: | ||
|image=[[File:AI.gif|64px|right]] | |image=[[File:AI.gif|64px|right]] | ||
}} | }} | ||
If you join a game in progress, you'll spawn on the [[Arrivals|arrival shuttle]]. You'll start buckled onto a chair. Use the '''B''' key to resist out of the chair (or click the HUD icon). | |||
===Finding Your Way Around=== | |||
One of the hardest things for new players is learning what there is on the station and where it is. This is compounded by the fact that we have [[Maps|several different stations]] with different designs. Look out for signs on the walls. Ask the people in the hallway. Look out for lines on the floor in the case of [[webmap:FlandStation|Fland]] or [[webmap:RadStation|Rad]] station. Ask the [[Mentor|mentors]]. | |||
We live in the future! And thanks to revolutionary advancements in technology, we have an online map viewer for all [[Maps|BeeStation stations]]! Check the map you are currently on in the status page and then find the webmap link on the [[Maps|maps page]]. | |||
It is helpful not just to find your way, but to get a more complete understanding of the stations. You can notice things here that are a common trend across all stations like: [[bar]] is always next to [[kitchen]], [[atmospherics]] are always next to [[engineering]], the [[Dormitory|dorms]] always have a room for cryosleep in case you want to leave the game, and more for you to discover! | |||
Since you've chosen [[Assistant]] as your role, you'll have no responsibilities. This means you can safely attempt to get your bearings without fear of someone telling you that you need to be doing something. Check out the [[FullControls#Tasks to practice the controls|full controls page for suggestions]]. Eventually, once you're confident in the controls, why not consider doing some [[How to Roleplay|roleplaying]]? This is a roleplay server, after all. | |||
:Items in the game have 4 different "weight classes," tiny, small, normal, and bulky. These weight classes determine | ===Inventory Management [[File:Backpack.png]]=== | ||
Items in the game have 4 different "weight classes," tiny, small, normal, and bulky. These weight classes determine which storage slots it can fit in, and what they can't fit in. If you are wearing a jumpsuit, the two item storage slots to the rightmost of your screen are your pockets. | |||
*These pockets can only store tiny and small items. | |||
*Your hands are where you can grab items and interact with them. | |||
*Your back is where you should have your backpack. | |||
*Your backpack is your main storage space, but it can only fit a limited number of items. You can stuff tiny, small, and normal classed items into your backpack. However, normal classed items will take up more storage space than a tiny classed item. | |||
*Your belt is where you store your toolbelt, (if you are an [[Station Engineer|engineer]]), your [[Laser Gun|gun]], or a variety of other different items, which range from swords to [[Defibrillator|defibrillators]]. | |||
* The items which you can fit in your suit storage (on the left most of your screen, below your gloves) depend on the uniform you are wearing. For example, a [[hardsuit]] would allow you to fit an oxygen tank in there, whilst an [[Armor Vest|armor vest]] would allow you to fit a [[laser gun]]. | |||
: | This is one of those things where there are a lot of exceptions. Simply ask around or experiment to find out all the interesting combinations of storage. | ||
===Using Internals=== | |||
Your character starts with a [[box]]. Inside the box you will find an EpiPen. It’s used to stabilize people in [[Crit|critical]] condition. You will also find an [[emergency oxygen tank]] and a breathing mask. In a situation where there is a lack of oxygen, a viral outbreak, or some toxic gas in the air you can use this. | |||
#Equip the mask into your mask slot [[File:Hud-Mask.png]] (press the equipment [[File:Hud-inventory.png]] icon to see it) or quickly equip with the '''E''' key. | |||
#Place the oxygen tank into your pockets and press the [[File:Gmaskinternalsicon.gif]] button on the top left. You are now breathing from the oxygen tank. | |||
Despite being called an emergency oxygen tank these puppies start with ~1000 kPa of pure oxygen. This, in layman’s terms, means you can breathe from one of these for about 30 minutes. You don’t have to fear running out of air in 5 minutes. The situation to use internals are not that common though. Lack of oxygen is usually accompanied by extreme temperature or pressure. The mask will not help with those. The best way to deal with things like breaches, fire or [[plasma]] fires is to run away from the affected area. | |||
===Using suit sensors=== | |||
Every [[Nanotrasen]] [[jumpsuit]] comes with a mechanism called [[suit sensors]]. Right click on your jumpsuit and use the “adjust suit sensors mode”. It should be, by default, set to the highest level. If not, make sure to set them. I’m sure you can guess what they do by name alone. [[Medical Doctor|Medical]] and [[Security Officer|Security]] crew have access to [[Crew Monitoring Console|crew monitoring consoles]]. They can also use [[Pinpointer|pinpointers]] to locate crew. This only works if your suit sensors are on. In the unfortunate case of your early departure from this moral coil the good folk in medical might possibly locate and resurrect or clone your sorry body. | |||
===What To Do if You Are Hurt or See Someone Hurt on the Ground?=== | |||
Go to the medbay. If you happen to see a dead or near dead person on the ground, you should take the following steps: Remember that EpiPen? Now is the time to use it. What is happening to a person in [[critical]] condition is that they are slowly suffocating. Injecting them with the EpiPen will prevent this suffocation, buying a lot of time. Then since they are hurt, they are probably bleeding. '''Do not drag them across the floor''' as this slowly kills them. Instead consult the [[FullControls|full controls]] page on how to lift a body in a fireman’s carry. Then take them to the medbay. | |||
===What To Do if You Are Attacked?=== | |||
In the case that someone attacks you, you are already dead probably. If you are attacked by a [[Blood Cult|blood cultist]] using [[Blood Cult#Blood Spells|eldritch magic]], blood weapons and that has the jump on you; it’s not supposed to be a fair fight. Or a fight at all rather. | |||
In the case where you [[Byond the impossible|are not already dead]]. The first thing you want to do is scream “HELP” in the global radio chat. Because we can’t play the game and talk, an all uppercase “help” is like a special summoning call for [[Security Officer|security]], the [[AI]], or the [[Medical doctor|medical]] crew. If you have your [[Suit sensors|sensors]] turned on you don’t have to say where you are being attacked. Once the [[Terminology#Valid/Validhunting|valid hunters]] have been summoned the next step is to run away (bravely!). Look for the main station corridor as it is a public area and has lots of space. Avoid going into areas you don’t know since you might dead-end yourself. | |||
Once you get better acquainted with the [[rules]] you can read the [[Guide to Combat|combat guide]] (outdated; ask some security players for classes), to learn how to fight back. | |||
===Radiation Storms=== | |||
When you hear a message stating: '''''"'''High levels of radiation detected near the station. Maintenance is best shielded from radiation.'''";''''' that means a [[Random events#Radiation Storm|radiation storm]] is coming. This message is misleading, because maintenance is the only place protected from radiation. Normally, if the heads are competent, a station-wide emergency will then be declared opening up [[maintenance]] even if you don't have access. All you have to do now is mill in [[maintenance]] until the radiation storm passes over. If you get hit by the radiation or feel sick in general head to the [[medbay]]. | |||
==Properly Leaving The Game (Cryosleep)== | |||
Too confused? Head hurts? Mom called you to eat dinner? Whatever the reason you wish to leave the game, there is a proper way to do it. Crew and job slots are based on the number of living crew. The proper way to leave the round is to go the [[Dormitory|dorms]] and find the cryosleep pods. They are bright green. If you can’t find the dorms just ask [[Crew|someone]] (like a [[mentor]]). There are usually signs as well such as “DORMS”, “SLEEP” or “REST”. If you lay into a cryosleep pod and then log out or rather exit the game your body will be removed from the round, you will become a ghost and an empty crew an job slot will open for someone else. Speaking of ghosts... | |||
==Death and Ghosts== | |||
Tried to be a [[Clown|funny guy]] with the [[Traitor|wrong]] [[Changeling|person]]? Wrong [[Blood Cult|place]], wrong [[Nightmare|time]] in maintenance? Whatever the case, you are now [[dead]]. Don’t despair just yet! If the [[Antagonist|bad man]] has not completely destroyed your body and you <u>turned your suit sensors on max</u> there is a chance that some good [[paramedic]] will find your charred and bruised corpse and bring it to the [[medbay]] to be revived or [[Clone|cloned]]. | |||
In the meantime, move the ghost out of your body. This is spectator mode. You can communicate with other dead players. It’s fine to talk in an [[OOC]] way in Dchat. In the case you are revived you are '''<u>not allowed</u>''' to use any information gained while being a ghost. You also will '''forget the last 5 minutes before your death''' when you are revived. Check the [[rules]] page. | |||
In while being a ghost there is a chance to be prompted to become things like xenomorphs or swarmer. Sometimes these are random events and sometimes admin interference. | |||
There is also a ghost spawner menu. From here you can spawn as certain things on [[Lavaland]]. If you choose to do this, you will no longer be able to revive or be cloned. When you spawn you are a new entity. You are unaware of your past life. For a new player a recommendation can be spawning as a [[Lavaland]] doctor. You get your own [[Lavaland]] hospital where you can freely practice [[Guide to medicine|medicine]] and [[surgery]] on monkeys as well as [[Guide to hydroponics|botany]] and [[Guide to chemistry|chemistry]]. | |||
==What Jobs to Take After Your First Round== | |||
The best beginner jobs are ones where no one is going to come to you asking for something you don't really understand. Assistant is the best because no one expects anything at all from you. You are free to explore and play with the controls. However once you get a grip on the controls is recommended to move to a job where still no one expects anything, but that have a designated objective. The recommended assistant ''plus'' roles are: | |||
*[[Janitor]]: People will expect nothing from you except maybe that you clean the floor. | |||
*[[Curator]]: The library is practically abandoned. Play with board games and painting. Organize books. Get fun loot from your curator beacon. | |||
*[[Cargo Technician|Cargo Tech]]: Move crates until you die. It is said that all SS13 journeys begin and end in cargo. This is because cargo is of vital importance to several game modes. As a CT you will get to see the flow of these rounds first hand. However, your job will only every be to just move crates. | |||
After that it's time to move on to some real roles. Funnily enough, the best way to learn these roles is to sign up as an assistant again. You are going to [[Beyond the impossible|use this role as intended]] and actually assist some departments. Going to the [[Head of Personnel|HoP]] or whatever place you want to learn about and asking nicely for someone to teach you is a very effective way to learn. The [[Head of Personnel|HoP]] can even give you custom job titles like "medical intern" or "brig receptionist". Job that are good for this are: [[Medical Doctor]], [[Scientist]], [[Station Engineer]]... This is also the best way to dip your toes safely into being a [[Security Officer]]. Be careful, because it's very easy to play security poorly, and [[Shitcurity|letting the power get to your head is a bad idea]]. | |||
Avoid joke roles such as the [[Clown]] or [[Mime]] at first. Many players find harassing the on board entertainment much more fun than any jokes the clown might otherwise have. | |||
After some time, when you're confident enough in your combat abilities, you should enable antagonists within your game preferences, so that you can roll for antag when the shift starts. A good half of the game is arguably being an antag and beating everyone up. Don't be scared that you will be a bad antag. Due to the fact that you can't predict what or when it will happen everyone was a painfully obvious antag at one point. It's just how the game works. You should however avoid team antag roles. [[Blood Cult|Blood cult]], blood brothers, [[Revolutionary|revolutions]], [[Clockwork Cult|clock cultists]], [[Nuclear Operative|nuclear operatives]], [[Xenomorph|xenomoprhs]]... The most common and "safe" antag options to dip you toes in are [[Traitor]] and [[Changeling]]. | |||
Latest revision as of 09:46, 8 April 2024
What is SS13?
Space Station 13 is a multiplayer sandbox that has a heavy focus on player interaction. In the year 2557, the megacorporation Nanotrasen employed you as a staff member onboard their latest state of the art research station. Nanotrasen claims to be researching plasma, a mysterious new substance, but rumors abound that the station is little more than a twisted social experiment...
 |
Tuterr, the Private Eye says: "Hmph. Fresh off the boat from Nanotrasen's recruitment office, huh? Let me tell you something, kid. You won't last five minutes on this floating deathtrap without help. You're as likely to be left for dead in a dark maintenance tunnel riddled with bullet holes as you are to get out of here alive. Lucky for you, I'm in a helpful mood today." |
At the start of each round, each player is assigned a role onboard the station. There are many jobs, such as the scientist performing research and development of new technologies, the medical doctor trying to keep people alive, or the simple janitor. There are many ways to play. The game also randomly chooses a round type, ranging from an all-out assault on the station by nuclear operatives, a sinister cult sacrificing crewmembers to summon their god, or more commonly, good ol' fashioned traitors. It is player driven and not some procedurally generated indie game. Every round on Space Station 13 is different and a completely unique experience.
Before Playing
Your choices matter in SS13. They have consequences. The rules are here to ensure that when drama and conflict happen, they happen in a way that is beneficial to all parties involved. You should read the rules before playing. If you don’t understand them all don’t worry. You can engage in the server more and more as you understand.
At a base level, don’t attack players without any reason. Role playing as an “insane person” is not valid. If you want to be extra safe (there is no reason to be this afraid though) you can avoid any kind of fight. Most rules define who, what, where and how is allowed to fight, main or kill someone else. If you don’t fight you automatically comply with these rules. One last point: Please, remember the human. SS13 can be highly frustrating. You will be unceremoniously killed, griefed, or die to some galactic space-bug shortly before executing your master plan. Everyone is here to play a game they enjoy, so keep that in mind before you bash someone's brain in with a toolbox because they took your multitool.
Getting Help
If you happen to get confused about something there are several ways to resolve this. The easiest is to contact a mentor. There is almost always at least one online. Don’t be shy! They love helping new players! In the top right there is a mentor tab. You can use “mentorwho” to check if any are online. Then you can use “mentorhelp” to send your question.
In the case there are none, you can ask the players around you. It might be difficult to communicate your problem in an IC (in character) way. It might also be difficult to answer in an IC way. That is why we have the LOOC or “local out of character” button which defaults to the U key. LOOC is a special yellow text visible only in the chat window. Meaning it has no rune text (text over the head). LOOC is used to discuss OOC things. For advanced users it’s used to set up more complex RP scenarios. For beginners, like yourself, it’s used to explain controls in a literal “click this press that” way that IC does not allow.
Setting Up
Download the BYOND client. If you are in the Discord server (you should be; it's where all the drama happens!), you can use the ?byond command in the bot-spam channel. BeeStation has one server:
- The Main BeeStation Sage: byond://sage.beestation13.com:7878
To join the game, you can use the links on the website. If you are in the Discord server there is a dedicated bot-spam channel. Use the “?cs” command to ask the bot about the current round information on the main BeeStation server Sage. The bot output will include a link that you can just click. These two methods are preferred by most veteran players (mostly the latter) since you avoid interacting with the icky Byond client. You can also use just "?c".
Once you are in you will see a small window with some buttons. This is either “Ready” and “Not Ready” buttons or the “Join Game!” button depending on if the round is about to start or on-going. There is also a “Create Character” button we will be using shortly.
BeeStation operates on a round based system. Every round is a new “shift” not related in any way to the past ones. The typical round length is around 1 hour and 30 minutes. This is because at that time there is a “crew transfer vote” which is basically a “are we done with this round?” vote. This is also plenty of time for things to go horribly wrong in the case of any of the major game modes.
If you jump onto the server, you are very likely to have joined during an active round. Using the “Status” tab, you can see the current round information. Speaking of which...
Client Interface
Look at the top right of the game window. You'll see some tabs. The most important tabs are the Status and Admin tabs. The admin tab contains the “adminhelp” button, used to contact admins directly if you have a rules question or believe someone is breaking the rules. For gameplay use the mentor tab. Here is a quick break down of the tabs:
- Status: Displays important info such as your ping, the current map, pressure remaining in airtanks, etc.
- Admin: Contains buttons that allow you if any admins are online, and most importantly, to send a message directly to the admins (the adminhelp button). If no admins are online, the message will be forwarded to the admin IRC channel.
- Mentor: Explained in the “getting help” section. Contains buttons that allow you to see if any mentors are online, and allow you to ask a question directly to the mentors (the "mentorhelp" button). Mentorhelps are not forwarded like adminhelps.
- IC: Usually, won't use this. The Pray button allows you to send a message to any admins online in character meaning it's used for "communicating with the gods". Or the Notes button which has your bank ID or shows any antag objectives if you have them.
- OOC: Stands for "Out of Character". Various functions that are related to the game, but not something your character does. View Webmap, View tracked playtime, and View Admin Remarks are the most used verbs here.
- Preferences: Self-explanatory. Contains various options you can toggle on and off. You can also open Character and Game Preferences at any time with the corresponding buttons.

On the right side will be the chat window. And above the chat window there are some tabs like “Admin” or “Preferences”. Feel free to immediately click the blue gear in the chat window and turn on night mode. Anyway, before you can join we need to create your character.
Character Creation
|
Tuterr, the Private Eye says: "You're brand new here, so make sure you sign up as an Assistant. Nanotrasen usually has checks to make sure fresh meat doesn't get to be the Captain, but if you manage to end up in that position, you'll probably be just another case for me to solve." |
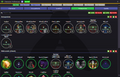
Recommended species for new players is human. Humans don’t have any major ups or downs. Later you can play as one of the more exotic species. Other than that, it’s all mostly cosmetic. Once you've finished editing your appearance, the box in the title bar should hopefully say "Saved!", verifying that your choices saved properly.
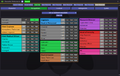
Job Preferences
The Occupations tab lets you select your job preferences when a new round is starting. You, as a new player, want to set assistant to ON. For more information about job distribution on round start see here. Again, this only applies to round start. In the case of on-going rounds, the “Join Game!” button will just let you pick what job you want assuming there are open slots. In the case of assistants that is always.
Some jobs have different character names when you play them, such as AI, Cyborg, Clown, and Mime. You can access these name options by pressing the hamburger button (three lines) next to your character's name in the Character tab. Please keep in mind that some of these roles are affected by Naming Guidelines.
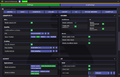
Game Preferences
You can also access your Game Preferences by pressing the gear at the top of the character setup. In this menu, you can customize various sound, UI, HUD, and other preferences.
Some of the most commonly modified preferences are:
- Sound toggles, typically ambience or lobby music.
- Pixel Scaling / Scaling Method, which determines how the game scales icons. Using a pixel perfect preset that fits your screen can increase the clarity of icons.
- FPS (frames per second).
- HUD Style, which adjusts the look of your ingame HUD.
- Ghost Chat toggles, these can reduce the clutter in chat while you are dead.
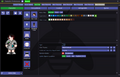
Antagonist Preferences
Once you are more familiar with the game, you can also customize your antagonist preferences in the Antagonists tab. By default, they start enabled, but are locked behind playtime, so don't worry, you won't be thrust into one of these roles before you know how to play. If you're worried about this, you can also go ahead and press the Global Disable Everything button at the top for now.
-
Character Creation Screen
-
Job Preferences Screen
-
Antagonist Preferences Screen
-
Game Preferences Window


HUD & Controls
The biggest barrier to entry in Space Station 13 is the controls. Despite the reputation once it clicks, you'll never have an issue with it again. Don't let it overwhelm you! After a round or two of practice, you should be fine.
HUD
|
Tuterr, the Private Eye says: ""Interface"? What the hell are you talking about, kid? "Blue buttons?" Geez, you've been here for five minutes and you're already cracking. Hmmm... *recorder crackles* Note to self - check atmospherics. Gas might be poisoned." |
The top right of the screen contains the action tabs and the bottom right is the text log or chat window. This is where you can see what people are saying, what's happening around you, and chat such as OOC or adminhelps. The bar along the bottom of the screen is the input bar, but since we're on Hotkey mode we won't need to use it. There are a few HUD elements on the main screen, so let's break them down into sections. Don't worry if you can't memorize what everything does at once. You can always come back to this guide.
The backpack ![]() icon can be toggled to show your worn equipment.
icon can be toggled to show your worn equipment.
The belt ![]() , backpack
, backpack ![]() , and pocket
, and pocket ![]() icons are all storage locations.
icons are all storage locations.
The drop ![]() and throw
and throw ![]() icons do what the name implies. Dropping is self explanatory, but the throw button is a toggle - if it's on and you click somewhere, you'll throw the item in your hand at where you clicked. (You can also press R to enable throwing and Q to drop your held item.)
icons do what the name implies. Dropping is self explanatory, but the throw button is a toggle - if it's on and you click somewhere, you'll throw the item in your hand at where you clicked. (You can also press R to enable throwing and Q to drop your held item.)
The pull ![]() icon only appears when dragging something, and can be pressed to stop dragging an object. Hotkey: "H".
icon only appears when dragging something, and can be pressed to stop dragging an object. Hotkey: "H".
The internals ![]() icon can be clicked to enable/disable your internals (oxygen tank and breath mask).
icon can be clicked to enable/disable your internals (oxygen tank and breath mask).
The resist ![]() icon can be pressed to break out of grabs, restraints, and if you're on fire, is the "stop drop and roll" button. Hotkey: "B".
icon can be pressed to break out of grabs, restraints, and if you're on fire, is the "stop drop and roll" button. Hotkey: "B".
The run/walk toggle ![]() icon can be pressed to switch between running and walking. Running is faster, but walking has benefits, such as being able to walk over water without slipping - useful for when the janitor doesn't put wet floor signs down. Hotkey: Hold "alt" to walk.
icon can be pressed to switch between running and walking. Running is faster, but walking has benefits, such as being able to walk over water without slipping - useful for when the janitor doesn't put wet floor signs down. Hotkey: Hold "alt" to walk.
The body selector ![]() icon is used to choose which body part you want to target. This is used for both targeting specific sections to heal, or targeting specific sections when attacking someone. Click a limb to target it. (You can target individual arms, legs, the head, the upper torso, the groin, the eyes, or the mouth.) Hotkeys: "numpad keys".
icon is used to choose which body part you want to target. This is used for both targeting specific sections to heal, or targeting specific sections when attacking someone. Click a limb to target it. (You can target individual arms, legs, the head, the upper torso, the groin, the eyes, or the mouth.) Hotkeys: "numpad keys".
The crafting menu ![]() icon opens the crafting menu.
icon opens the crafting menu.
The speech bubble ![]() icon opens the languages menu. You won't need to use this for the tutorial.
icon opens the languages menu. You won't need to use this for the tutorial.
![]() Oxygen warning - The air you're breathing doesn't have enough oxygen.
Oxygen warning - The air you're breathing doesn't have enough oxygen.
![]() Pressure warning - Pressure levels are too high (red) or too low (black). Low and high pressures can kill you.
Pressure warning - Pressure levels are too high (red) or too low (black). Low and high pressures can kill you.
![]() Toxin warning - You are breathing in toxic gases.
Toxin warning - You are breathing in toxic gases.
![]() Fire warning - The air is hot enough to burn you.
Fire warning - The air is hot enough to burn you.
![]() Freeze warning - The air is cold enough to freeze you.
Freeze warning - The air is cold enough to freeze you.
![]() Temperature warning - You're too cold or too hot.
Temperature warning - You're too cold or too hot.
Controls

Don’t get scared by the hotkey image. It shows all the controls and their alternatives. This might seem like a lot, but don't worry, you'll only be using a few most of the time. The control are quite elegantly designed. There are exceptions, but for the most part you will be able to do anything from surgery to nuclear science with the exact same controls. You won't need to memorize 20 hotkeys.
The default control scheme is “hotkeys” set in the game preferences menu. In case it’s not working you will see the bottom-right textbox in a red color. Click anywhere in the game window and press Tab. The textbox should go white showing that you are in “hotkey” mode.
- Use the WASD keys to move around.
- Press the X key to swap your active hand. The hand system is explained below.
- Press the Q key to drop what you are currently holding in your hand on the ground.
- Press the T key to talk. Prefix what you say with a semicolon (;) to say it in the global radio channel. Use the M key for non-verbal actions like “smile” or “wave”.Use the U key for LOOC (described in Getting Help).
- Use left click on a thing to interact with it. Interact means different things based on the thing you are clicking. Use right click for a context menu (mostly used for stacks of items).
- Press the Z key with an item in hand to “use” it.
- Use SHIFT + click on anything to examine it. Your new favorite button combo. It will describe what you are looking at. As a new player you will be using this very often. Use this on anything and everything.
If you just want to just jump into a round immediately the above controls should be enough for your first round. Doing a task, like, asking someone where the drink vending machine is, buying and then drinking something is a good way to start getting the hang of the controls.
It is necessary to read the full controls page after your first (or such) round, however. You can also check out all the available hotkeys.
Gameplay Concepts
Before getting into anything else, it's important to note that since SS13 is such an open ended game that has other people in it, when you get in game and try to follow the guide, things may go wrong - the station might have been almost entirely consumed by a singularity, a traitor could attack you with a powerful weapon, or something no one could have predicted will kill you. It's important to not let death get to you! There are multiple ways you can be brought back into the game, so don't get frustrated if something happens.
|
Tuterr, the Private Eye says: "You know, as much as I like to rib the fresh meat, it doesn't really matter if something happens to them - Nanotrasen thinks death is a waste of money, they'll just get cloned or something. What? Oh, shit, I gotta go. *click* You, uh, didn't hear that - right, kid?" |
The Hands System
If an item requires two hands to use, then the other hand slot will instead be labeled as “off-hand”. Why do I start by telling you this? Because only one hand can be selected at a time. Imagine yourself as a creature with one hand. You only sprout a second hand when you need to use two handed items.
Another time when you sprout an extra hand is to just hold an item. That is because your hands are also just a part of your inventory. However, think of them as an “active” part of your inventory. You place items in these “active” slots when you want to use them.
The bright box around one of your hands is the selected hand. Swap your selected hand with the X key. This is the hand that's used whenever you click on something. If it’s empty. Otherwise, you will use what you are holding in your hand on what you clicked on.
This can also cause problems with backpacks, boxes, and other containers. If you want to open a container, Alt + Click it. You can also pick it up, then switch hands and click on the container with an empty hand. Clicking on a container with an object will put it in the container. This also means that if you'd like to take your backpack off, you need to click and drag the bag to an empty hand. Normal click just opens the equipped bag.
If you find this confusing, you should go check out the full controls page already! It goes hand in hand (GET IT!?) with this explanation. If you still find it confusing, then maybe you should play your first round already because it really is not that complicated.
Intents
The intent selector has four modes: help ![]() , disarm
, disarm ![]() , grab
, grab ![]() , and harm
, and harm ![]() . This system mostly controls how you interact with things with your bare hands. You can learn more about these uses on the intents page. It's not, however, critical that you learn this right now. When it comes to using things this system is much simpler then it appears. Using a crowbar on someone will hit them regardless of intent. Most items work like that. Instead when it comes to things there are special use cases, for example:
. This system mostly controls how you interact with things with your bare hands. You can learn more about these uses on the intents page. It's not, however, critical that you learn this right now. When it comes to using things this system is much simpler then it appears. Using a crowbar on someone will hit them regardless of intent. Most items work like that. Instead when it comes to things there are special use cases, for example:
- While doing surgery, if you are not on help
 intent, you will intentionally botch it.
 - Clicking on something next to you with a gun will shot them point blank. If, however, you are on harm
 intent you will hit them with the weapon instead.
 - Using harm intent on an airlock with a welder will weld it shut instead of repair it.
You don't need to know these things right now. It's just so you understand the types of specific thing you will use intents for. The only intent related thing I want you to know for now is that clicking on people with and empty hand with help ![]() intent will hug them. Very important.
intent will hug them. Very important.
Playing the Game

 |
C-05-MO, the AI says: "Hello! The automatic diagnostic and announcement system welcomes you to Space Station 13. Remember: Have a secure day." |
If you join a game in progress, you'll spawn on the arrival shuttle. You'll start buckled onto a chair. Use the B key to resist out of the chair (or click the HUD icon).
Finding Your Way Around
One of the hardest things for new players is learning what there is on the station and where it is. This is compounded by the fact that we have several different stations with different designs. Look out for signs on the walls. Ask the people in the hallway. Look out for lines on the floor in the case of Fland or Rad station. Ask the mentors.
We live in the future! And thanks to revolutionary advancements in technology, we have an online map viewer for all BeeStation stations! Check the map you are currently on in the status page and then find the webmap link on the maps page.
It is helpful not just to find your way, but to get a more complete understanding of the stations. You can notice things here that are a common trend across all stations like: bar is always next to kitchen, atmospherics are always next to engineering, the dorms always have a room for cryosleep in case you want to leave the game, and more for you to discover!
Since you've chosen Assistant as your role, you'll have no responsibilities. This means you can safely attempt to get your bearings without fear of someone telling you that you need to be doing something. Check out the full controls page for suggestions. Eventually, once you're confident in the controls, why not consider doing some roleplaying? This is a roleplay server, after all.
Inventory Management 
Items in the game have 4 different "weight classes," tiny, small, normal, and bulky. These weight classes determine which storage slots it can fit in, and what they can't fit in. If you are wearing a jumpsuit, the two item storage slots to the rightmost of your screen are your pockets.
- These pockets can only store tiny and small items.
- Your hands are where you can grab items and interact with them.
- Your back is where you should have your backpack.
- Your backpack is your main storage space, but it can only fit a limited number of items. You can stuff tiny, small, and normal classed items into your backpack. However, normal classed items will take up more storage space than a tiny classed item.
- Your belt is where you store your toolbelt, (if you are an engineer), your gun, or a variety of other different items, which range from swords to defibrillators.
- The items which you can fit in your suit storage (on the left most of your screen, below your gloves) depend on the uniform you are wearing. For example, a hardsuit would allow you to fit an oxygen tank in there, whilst an armor vest would allow you to fit a laser gun.
This is one of those things where there are a lot of exceptions. Simply ask around or experiment to find out all the interesting combinations of storage.
Using Internals
Your character starts with a box. Inside the box you will find an EpiPen. It’s used to stabilize people in critical condition. You will also find an emergency oxygen tank and a breathing mask. In a situation where there is a lack of oxygen, a viral outbreak, or some toxic gas in the air you can use this.
- Equip the mask into your mask slot
 (press the equipment
  icon to see it) or quickly equip with the E key.
 - Place the oxygen tank into your pockets and press the
 button on the top left. You are now breathing from the oxygen tank.
Despite being called an emergency oxygen tank these puppies start with ~1000 kPa of pure oxygen. This, in layman’s terms, means you can breathe from one of these for about 30 minutes. You don’t have to fear running out of air in 5 minutes. The situation to use internals are not that common though. Lack of oxygen is usually accompanied by extreme temperature or pressure. The mask will not help with those. The best way to deal with things like breaches, fire or plasma fires is to run away from the affected area.
Using suit sensors
Every Nanotrasen jumpsuit comes with a mechanism called suit sensors. Right click on your jumpsuit and use the “adjust suit sensors mode”. It should be, by default, set to the highest level. If not, make sure to set them. I’m sure you can guess what they do by name alone. Medical and Security crew have access to crew monitoring consoles. They can also use pinpointers to locate crew. This only works if your suit sensors are on. In the unfortunate case of your early departure from this moral coil the good folk in medical might possibly locate and resurrect or clone your sorry body.
What To Do if You Are Hurt or See Someone Hurt on the Ground?
Go to the medbay. If you happen to see a dead or near dead person on the ground, you should take the following steps: Remember that EpiPen? Now is the time to use it. What is happening to a person in critical condition is that they are slowly suffocating. Injecting them with the EpiPen will prevent this suffocation, buying a lot of time. Then since they are hurt, they are probably bleeding. Do not drag them across the floor as this slowly kills them. Instead consult the full controls page on how to lift a body in a fireman’s carry. Then take them to the medbay.
What To Do if You Are Attacked?
In the case that someone attacks you, you are already dead probably. If you are attacked by a blood cultist using eldritch magic, blood weapons and that has the jump on you; it’s not supposed to be a fair fight. Or a fight at all rather.
In the case where you are not already dead. The first thing you want to do is scream “HELP” in the global radio chat. Because we can’t play the game and talk, an all uppercase “help” is like a special summoning call for security, the AI, or the medical crew. If you have your sensors turned on you don’t have to say where you are being attacked. Once the valid hunters have been summoned the next step is to run away (bravely!). Look for the main station corridor as it is a public area and has lots of space. Avoid going into areas you don’t know since you might dead-end yourself.
Once you get better acquainted with the rules you can read the combat guide (outdated; ask some security players for classes), to learn how to fight back.
Radiation Storms
When you hear a message stating: "High levels of radiation detected near the station. Maintenance is best shielded from radiation."; that means a radiation storm is coming. This message is misleading, because maintenance is the only place protected from radiation. Normally, if the heads are competent, a station-wide emergency will then be declared opening up maintenance even if you don't have access. All you have to do now is mill in maintenance until the radiation storm passes over. If you get hit by the radiation or feel sick in general head to the medbay.
Properly Leaving The Game (Cryosleep)
Too confused? Head hurts? Mom called you to eat dinner? Whatever the reason you wish to leave the game, there is a proper way to do it. Crew and job slots are based on the number of living crew. The proper way to leave the round is to go the dorms and find the cryosleep pods. They are bright green. If you can’t find the dorms just ask someone (like a mentor). There are usually signs as well such as “DORMS”, “SLEEP” or “REST”. If you lay into a cryosleep pod and then log out or rather exit the game your body will be removed from the round, you will become a ghost and an empty crew an job slot will open for someone else. Speaking of ghosts...
Death and Ghosts
Tried to be a funny guy with the wrong person? Wrong place, wrong time in maintenance? Whatever the case, you are now dead. Don’t despair just yet! If the bad man has not completely destroyed your body and you turned your suit sensors on max there is a chance that some good paramedic will find your charred and bruised corpse and bring it to the medbay to be revived or cloned.
In the meantime, move the ghost out of your body. This is spectator mode. You can communicate with other dead players. It’s fine to talk in an OOC way in Dchat. In the case you are revived you are not allowed to use any information gained while being a ghost. You also will forget the last 5 minutes before your death when you are revived. Check the rules page.
In while being a ghost there is a chance to be prompted to become things like xenomorphs or swarmer. Sometimes these are random events and sometimes admin interference.
There is also a ghost spawner menu. From here you can spawn as certain things on Lavaland. If you choose to do this, you will no longer be able to revive or be cloned. When you spawn you are a new entity. You are unaware of your past life. For a new player a recommendation can be spawning as a Lavaland doctor. You get your own Lavaland hospital where you can freely practice medicine and surgery on monkeys as well as botany and chemistry.
What Jobs to Take After Your First Round
The best beginner jobs are ones where no one is going to come to you asking for something you don't really understand. Assistant is the best because no one expects anything at all from you. You are free to explore and play with the controls. However once you get a grip on the controls is recommended to move to a job where still no one expects anything, but that have a designated objective. The recommended assistant plus roles are:
- Janitor: People will expect nothing from you except maybe that you clean the floor.
- Curator: The library is practically abandoned. Play with board games and painting. Organize books. Get fun loot from your curator beacon.
- Cargo Tech: Move crates until you die. It is said that all SS13 journeys begin and end in cargo. This is because cargo is of vital importance to several game modes. As a CT you will get to see the flow of these rounds first hand. However, your job will only every be to just move crates.
After that it's time to move on to some real roles. Funnily enough, the best way to learn these roles is to sign up as an assistant again. You are going to use this role as intended and actually assist some departments. Going to the HoP or whatever place you want to learn about and asking nicely for someone to teach you is a very effective way to learn. The HoP can even give you custom job titles like "medical intern" or "brig receptionist". Job that are good for this are: Medical Doctor, Scientist, Station Engineer... This is also the best way to dip your toes safely into being a Security Officer. Be careful, because it's very easy to play security poorly, and letting the power get to your head is a bad idea.
Avoid joke roles such as the Clown or Mime at first. Many players find harassing the on board entertainment much more fun than any jokes the clown might otherwise have.
After some time, when you're confident enough in your combat abilities, you should enable antagonists within your game preferences, so that you can roll for antag when the shift starts. A good half of the game is arguably being an antag and beating everyone up. Don't be scared that you will be a bad antag. Due to the fact that you can't predict what or when it will happen everyone was a painfully obvious antag at one point. It's just how the game works. You should however avoid team antag roles. Blood cult, blood brothers, revolutions, clock cultists, nuclear operatives, xenomoprhs... The most common and "safe" antag options to dip you toes in are Traitor and Changeling.